How-To: Set Up an Outbound Path
Platform: UnsubCentral (USC)
Feature: Exchange Connector (Outbound)

Steps to Follow
Outbound Connector
1. To create an Outbound Connector in O365, open the O365 Exchange Admin Console and go to Mail Flow > Connectors.
2. Create a new Outbound Connector from Office 365 to a Partner Organization, and click on Next.

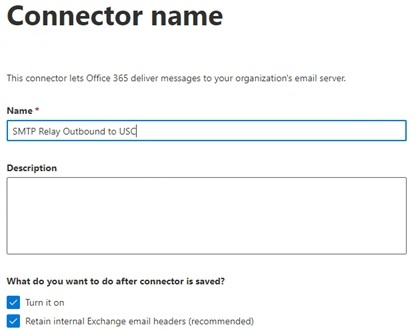
3. Give the Outbound Connector a descriptive name.
4. Select the Turn it on checkbox, and click on Next.
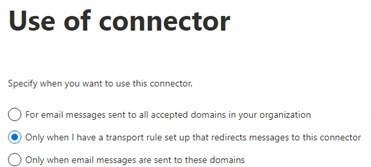
5. Select Only when I have a transport rule set up that redirects messages to this connector, and click on Next.
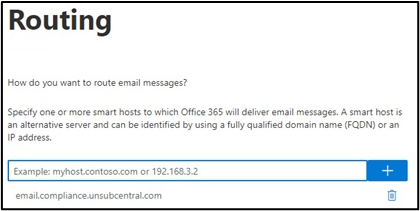
6. Select Route mail through this smart host and enter the appropriate USC Smart Host email.compliance.unsubcentral.com at the beginning of this document. Click on the ![]() button and then on Next.
button and then on Next.
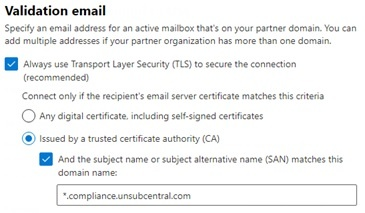
7. Select the cert option to only use a certificate Issued by a trusted certificate authority (CA). Click on Next.
8. You will need to validate that the Smart Host is accepting your emails. Add an appropriate address and click on the ![]() button to add it.
button to add it.
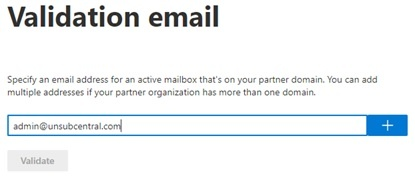
9. Click on the Validate button to verify that the connector works.
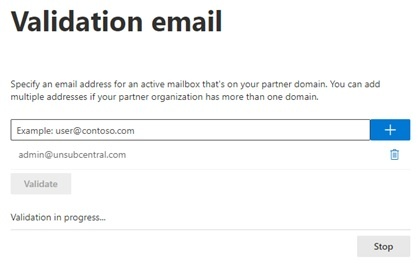
10. If it completes successfully, click Next to add it. If not, verify that the settings are correct and that UnsubCentral is ready to receive emails from your domain.
Distribution or Security Group
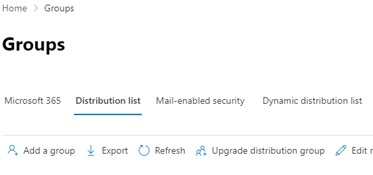
1. To create a dedicated Distribution Group or Mail-Enabled Security Group for senders that should use the USC system, open the O365 Exchange Admin Console and go to Recipients > Groups
(We are creating a Distribution Group in our example)
2. Select Add Group.
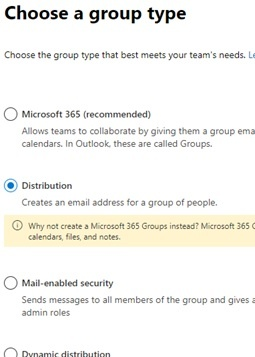
3. Select Distribution, and click on Next.
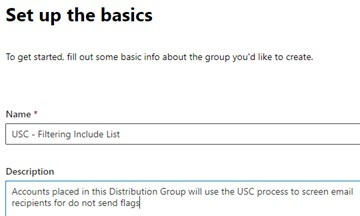
4. Add a descriptive name for the Distribution Group, and click on Next.
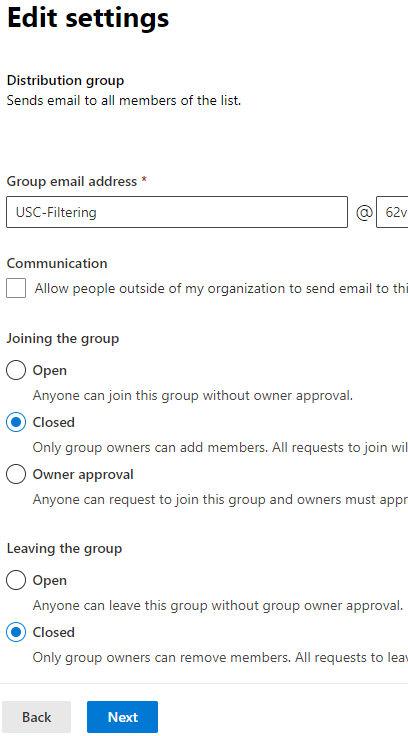
5. Add an appropriate email address for the new Distribution Group and select the settings most appropriate for your organization. Click on Next.
This Distribution Group will NOT need to receive emails from outside your organization for the USC process
6. Review the settings on the next page, and click on Create Group.
7. Search for and open your new Distribution Group
8. On the Settings tab, you might want to select Hide this group from the Global Address List. This is optional and will work either way.

9. In the Members tab, click on View and manage members and then on Add members to add anyone that should be included in the USC recipient filtering.
Outbound Transport Rule
1. To create Outbound Transport Rule, open the O365 Exchange Admin Console and go to Mail Flow > Rules. Create a New Rule.

2. Add a descriptive name for the Transport Rule.
3. Under Apply this rule if…, add the following Conditions:
The recipient is located… > Select one… > Outside the organization

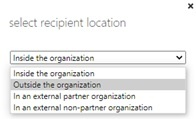
Click on Add Condition (you might need to select the More options at the bottom of the window to add more conditions)

Repeat the same process to create another Condition for if the Sender is located Inside the organization.
For the last Condition, select The Sender… > is a Member of this group
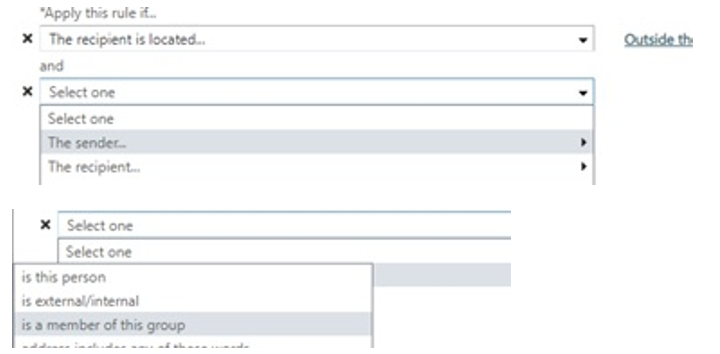
Search for and select the Distribution Group created in the previous section. Click on the Add button and then on OK.
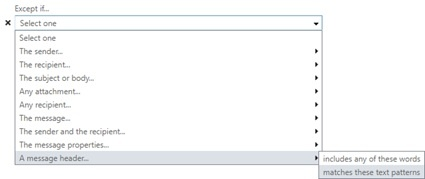
4. Under Do the following…, add the following Actions:
Modify the message properties > Set a message header
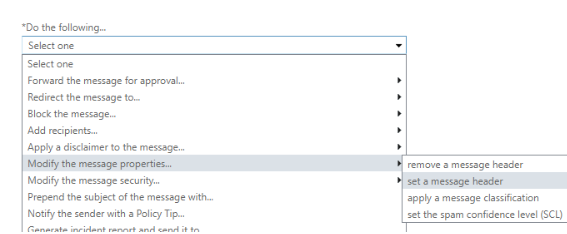
Select Enter text and add the Message Header (do not include <> or spaces): < X-ZUAPI-YOURCLIENTID>
Select Enter text and add the Header Value (do not include <> or spaces): < YOURAPIKEY >

Select Add Action.

For the next Action, select Redirect message to > the following connector.

Select the Outbound Connector created earlier and click on OK.

6. Add an Exception to identify USC processed emails to prevent looping

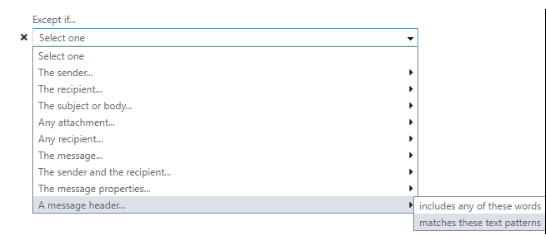
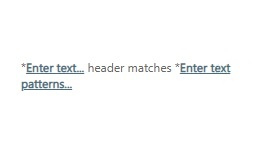
Select Enter text and add the Message Header (do not include <> or spaces): < X-ZUAPI-Mailclass >
Select Enter text and add the Header Value (do not include <> or spaces): < ZH_UCentral >
To download instructions in form of a document, please click below:
