
How-To: Set Up Compliance Rules (Outbound)
Platform: UnsubCentral (USC)
Feature: Google Workspace Compliance Rules

Steps to Follow
Open Compliance Menu
1. Within the Apps section, select Gmail from the Google Workspace menu.
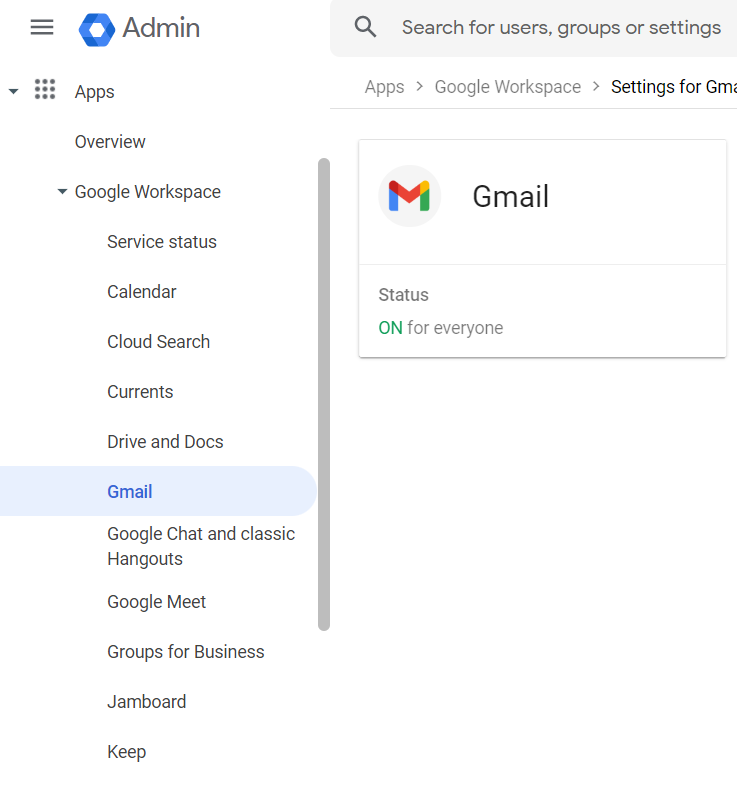
2. Next, in the Settings section, select the Compliance option to select when the email is relayed out to the service.
Add Compliance Rule
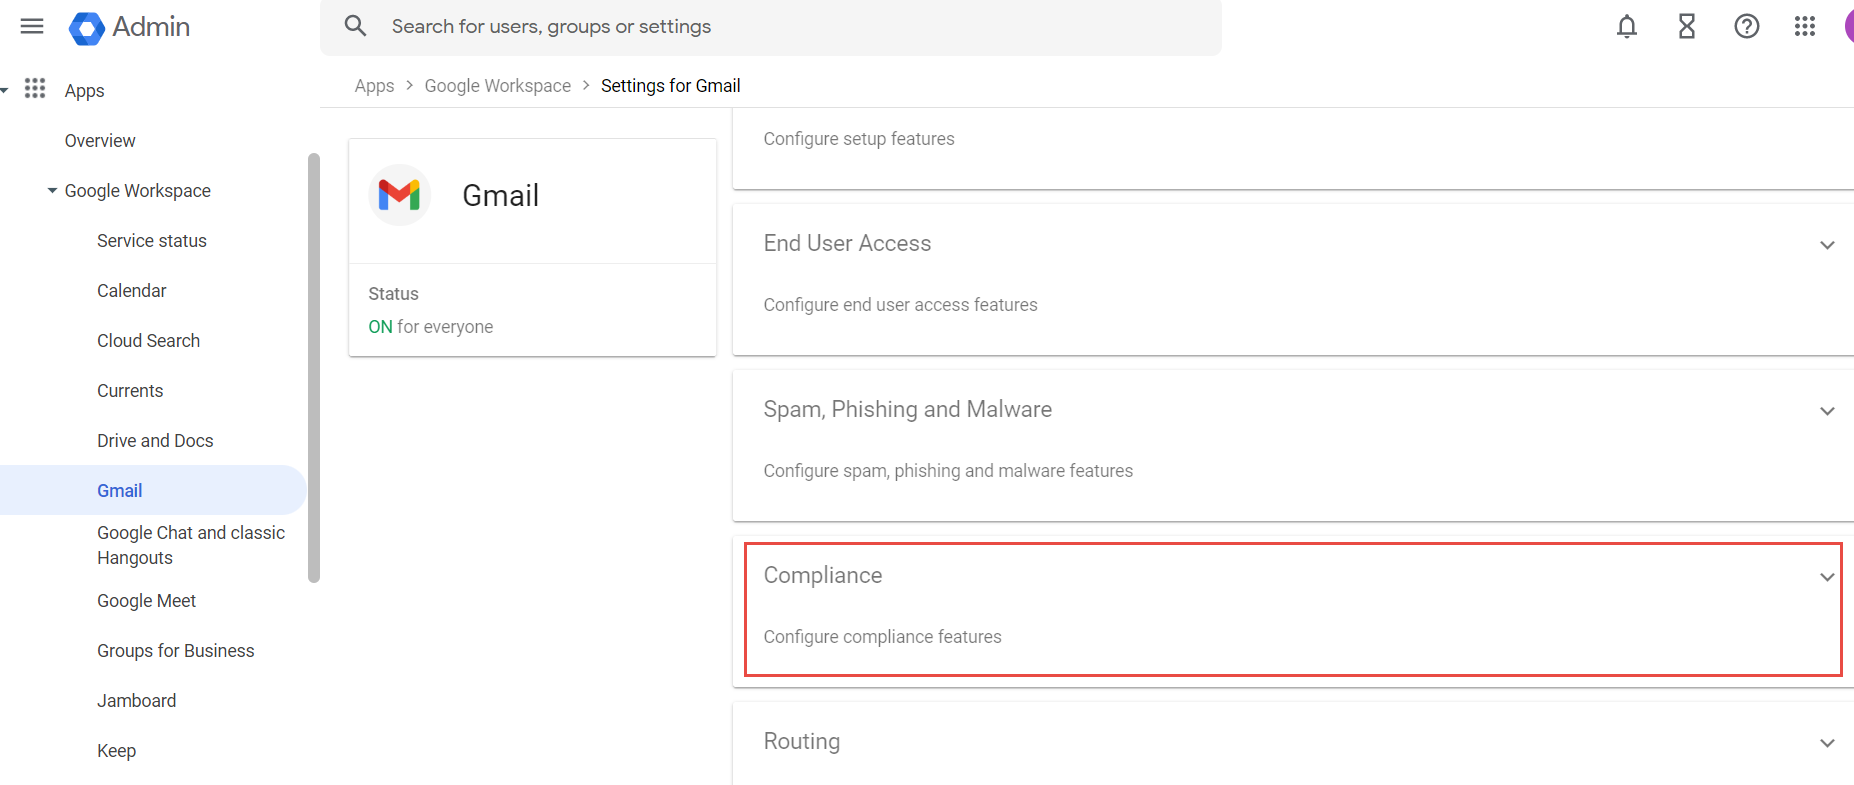
3. To create a new rule, scroll down to the Content compliance section and click on Add Another Rule.

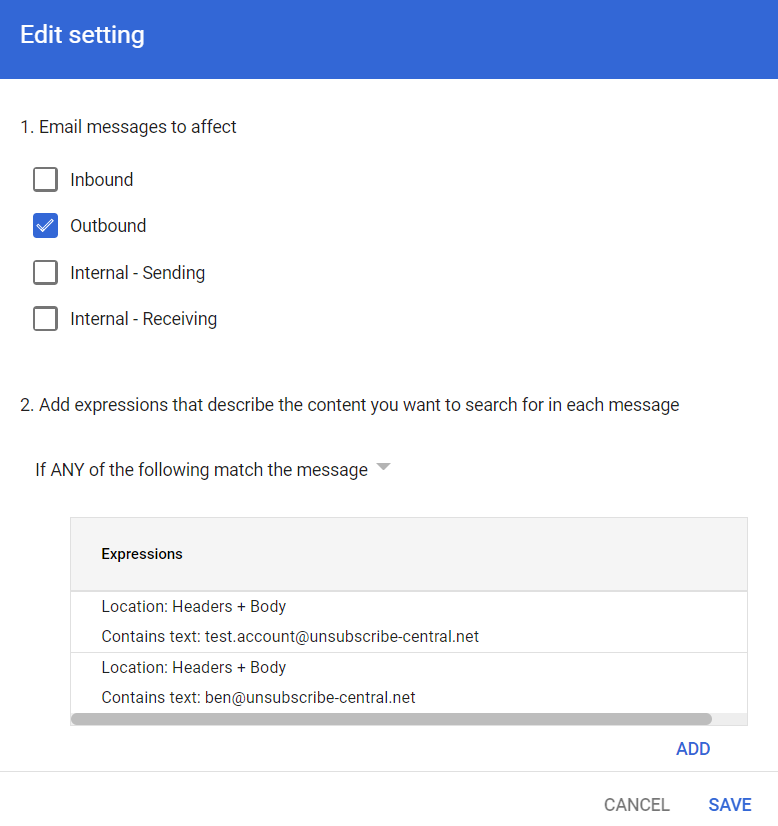
4. Within the new window that appears, type a description that helps you identify the rule. In our case, we used Outbound Filter Relay to USC.
5. To ensure the rule applies to Outbound traffic only, click on the Outbound checkbox:
Add Expression
6. Add individuals this rule should apply to, by creating Expressions that check if the individual email address is present in the header and body. To create a new rule, click on Add within the screen shown above.
7. From the dropdown, select Advance content match to specify which parts of the message to use for the match. Further, select:
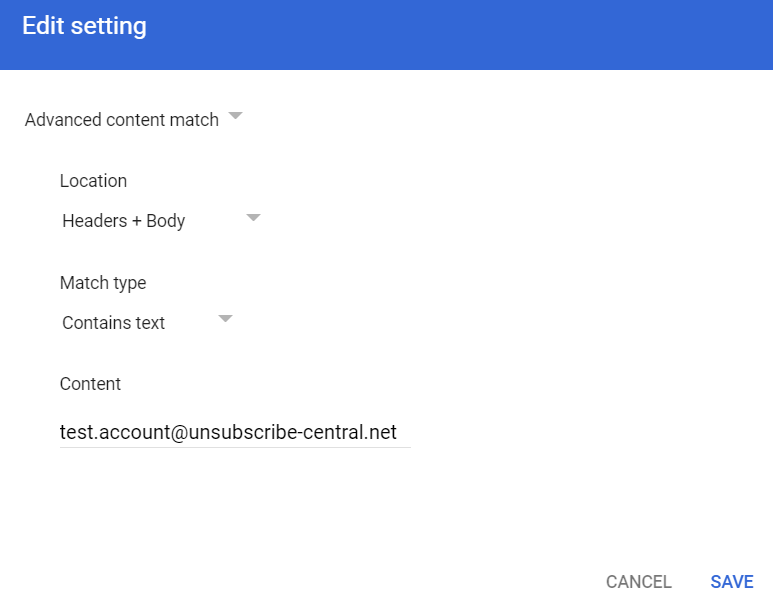
Location > Header + Body
Match type > Contains text
Content > Type in the email address that you'd want to apply the rule for, in the free text box
Click on Save to apply.
You’ll be able to add multiple individuals of your choice. Repeat steps 1 to 5 directly above for every email address you would like the rule to apply for.
Add Custom Header
As the rule is applied, a custom header should be added to the outgoing messages.
8. Select Modify Messages from the dropdown and click on the Add custom headers checkbox to enable adding the unique custom header value you have been supplied with.
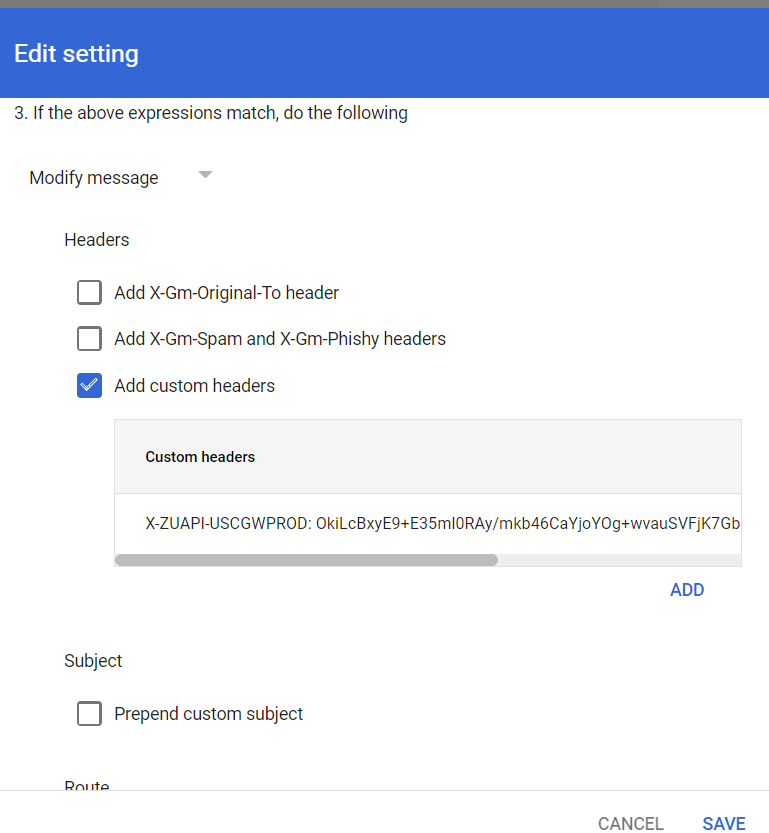
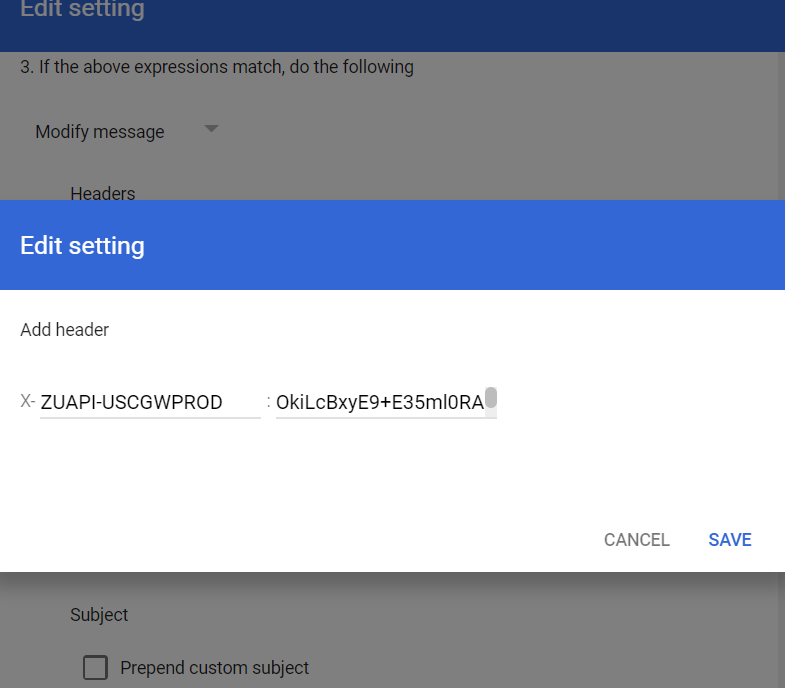
9. Click on Add.
10. In the window that appears, add your unique header.
Type ZUAPI-USCGWPROD as the Header-key and unique Header value you have been supplied with by UnsubCentral and click on Save to add the setting
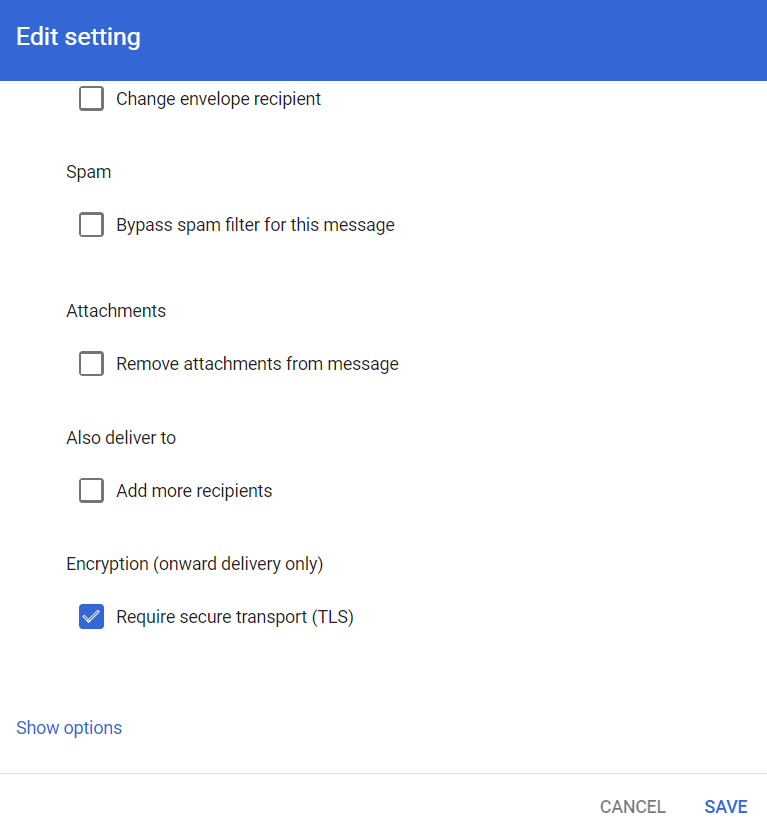
The check boxes in the settings should be deselected as default. Only the Route and Encryption Check boxes should be changed
Change Route
11. In the Route Section, click on the Change Route check box, and from the dropdown, select the Host previously set up. In our case this is UnsubCentral.

Set Encryption
12. Scroll further down to the Encryption Section and select the Requires secure transport (TLS) checkbox.
13. To apply all these changes made, click on Save.
Related Articles
How-To: Set Up a Host in Gmail